Adventures in Worm Composting

A reader asked whether any of my multiple worm bins have overwintered outdoors. The answer is yes. Well, kind of.

Let me give you an overview of the worm farming situation here. I’m not great at raising worms, although it’s supposed to be foolproof. (I refer all questions to Castaway Compost, my go-to for all things vermicompost. Check out my Farm Indiana piece on Keith O’Dell, pirate worm composter.)

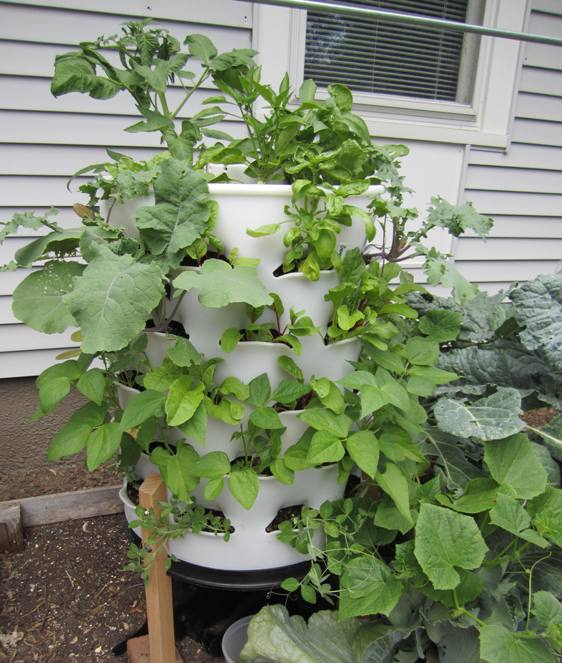
1. My first experience was with my Garden Tower. I discovered too late that I stuffed the center tube too full, too fast. This tube is where the worms are supposed to eat their jolly way through my food scraps all summer long, and theoretically survive the winter. In the compacted medium, let’s just say they did not thrive one iota. (This year I’m being more more judicious with my feedings.)

2. Then I started a store-bought dealie with four layers. I am still only on the second layer almost a year later. I can’t figure out how to get my wigglers to eat and reproduce very fast. And I’m not sure when to harvest the castings. But I haven’t completely killed anyone off yet—that I know of.

Here’s a top view of my Sunleaves bin. I used coconut coir as the bedding. This was before I added the second layer, using shredded office paper as the bedding.

My storebought worm bin, which stays in the basement year-round.

My store-bought worm bin, which stays in the basement year-round.

3. My third foray is indeed a year-round outdoor “bin”—more of a pit, really. We used a book called The Complete Compost Gardening Guide as our inspiration for this project. The idea is to have a covered hole in which to compost food and yard waste, convenient to your kitchen door. So, last fall we dug a rectangular pit about 18 inches deep. (I use the word “we” loosely on this digging bit.)

I forgot to document the digging and building phases.

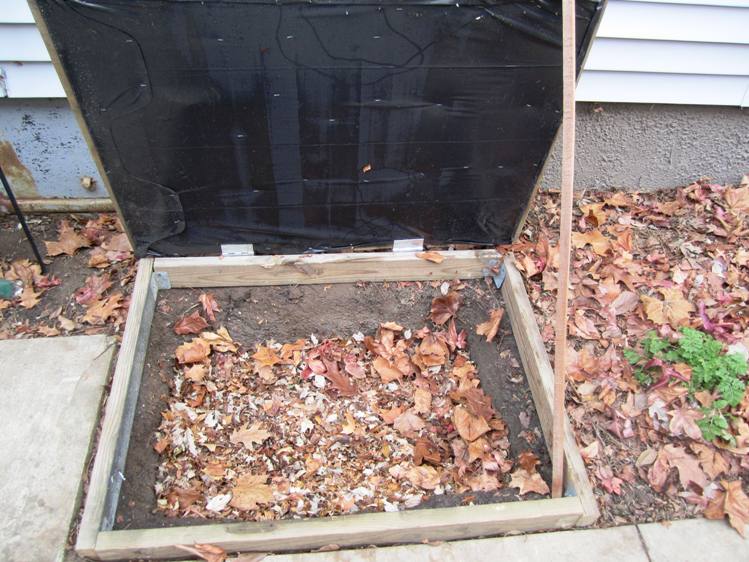
Unfortunately I forgot to document the digging and building phases.

We started off by putting shredded leaves from our yard (and the neighbors’) into the pit, without adding any worms. We cover all our garden beds with the same stuff.

Affixing hardware to the lid, which I believe was cobbled together from old pallets.

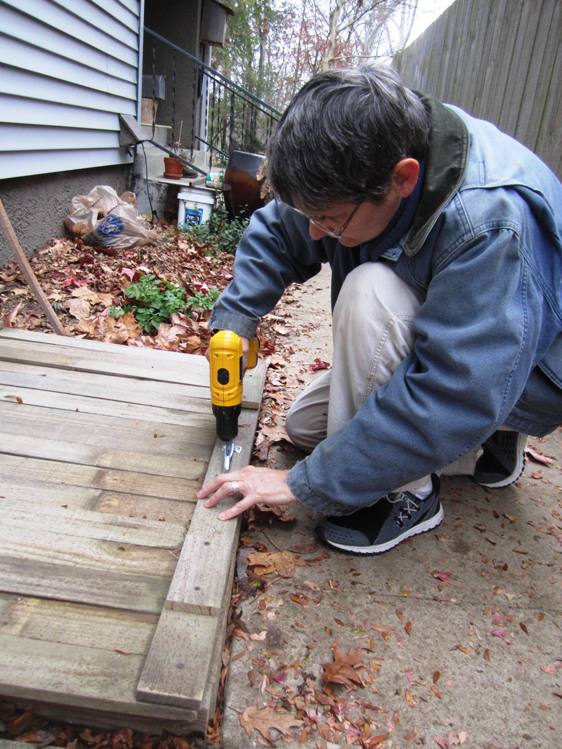
Judy affixing hardware to the lid, which I believe was cobbled together from old pallets.

At the time I did not have a paper shredder that worked, so I geeked out on hand shredding things for a while. I just really like the idea of worms eating stuff like phone books and toilet paper rolls!

A very patient friend spent an evening helping me create paper bedding to add to the shredded leaves. Worm farming = big fun for all!

A very patient friend spent an October evening helping me tear up paper to add to the shredded leaves. Worm farming = big fun for all!

We added the shreds to the leaves along with some vegetable scraps for worms to munch on.

Creating a nice buffet and bed for the wigglers.

Creating a nice buffet and bed for the wigglers.

The next step was to moisten everything well. Worms do not like dry places.

Mixing and moistening

Mixing and moistening. I must not have had any rainwater.

The book said something about worms appreciating the channels in corrugated cardboard, so I added some wet strips of cardboard. It also said they go crazy for cornmeal or wheat flour. We had a bag of flour that a mouse had chewed through, so I sprinkled some of that on top. Then it was Wiggler Time.

The dark stuff is a handful of bedding and worms from the indoor bin.

The dark stuff is a handful of bedding and worms from the indoor bin.

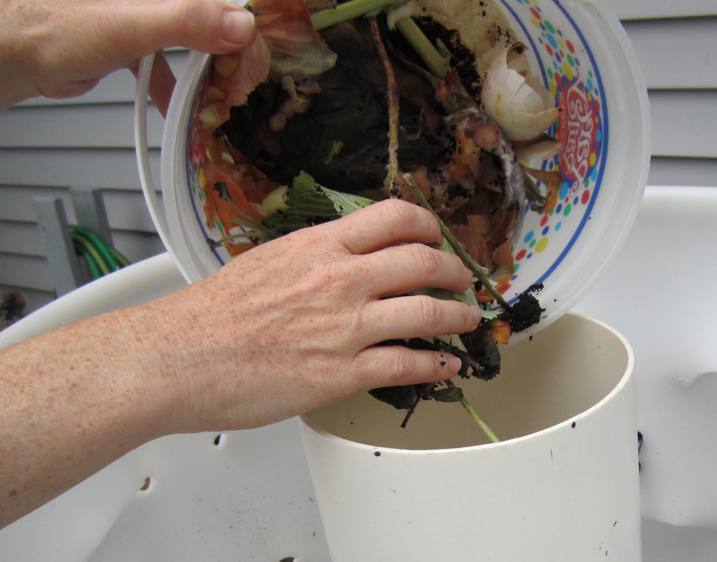
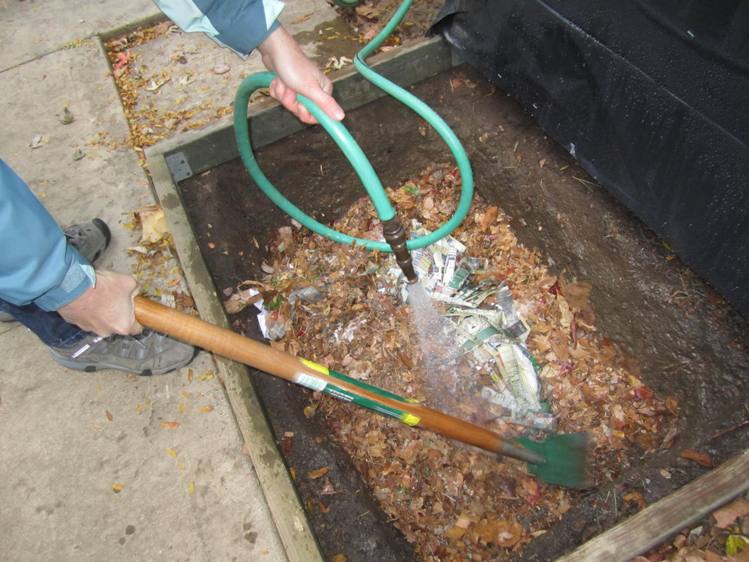
After that, we just tossed our kitchen scraps on top, crushing egg shells as best we could with a hoe. We did it all winter long, except when the lid was frozen shut or buried under snow.

Then this spring, someone suggested spreading some soil on top and giving the worms a break from new food. I did that, and later added a layer of shredded paper. (Our Christmas gift to ourselves was a whiz-bang shredder. Total Geekdom.)

Shredded paper as mentioned in my previous post!

Shredded paper, as detailed in my previous post

Now you can see, a few months later, that the stuff is well on its way to becoming a sweet soil amendment. Worms are still in there. (Whether they’re the original worms or their offspring or some random opportunists, I can’t say. But I think I can claim this as an overwintering victory.)

Lots of brown eggshells still showing. What can I say, I eat a lot of eggs.

Lots of brown eggshells still showing. What can I say, I eat a lot of eggs.

I recently pulled the bulk of the material to one side to begin adding another round of food scraps. The experiment continues…

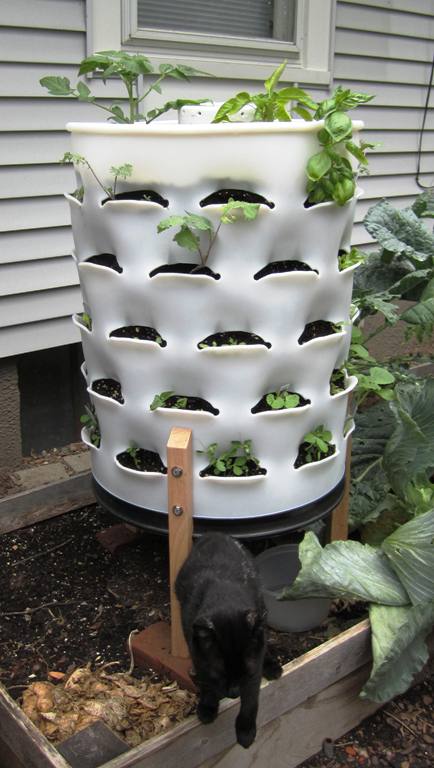
There’s still a fourth bin to talk about, also outside, which is new this summer. But that might be for another day. Let me see how it works out first!

Thar be worms in that thar bin (unless they've perished in the heat).

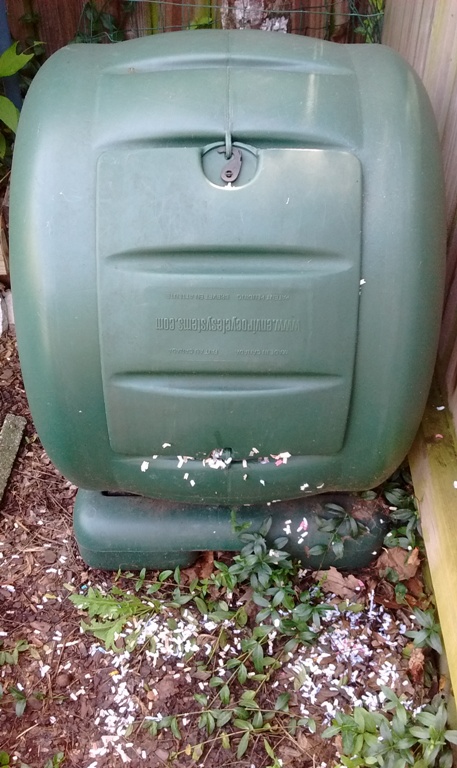
Thar be worms in that thar bin (unless they’ve perished in the heat).

Building Soil, Growing Food, Nurturing Relationships

I just listened to a podcast interview with Linda Proffitt, founder and executive director of Global Peace Initiatives here in Indianapolis. I’ve known Linda since the days I was responsible for Nuvo Newsweekly’s monthly social justice calendar. Back then I called her regularly to find out about GPI’s peace hikes and other activities, and I was always impressed with her programming.

Since that time GPI’s work has exploded onto the local resilience scene. They started by helping church groups grow food for the hungry, bringing countless volunteers together to experience the transformational power of service initiatives.

peasIn 2011, the organization began a new partnership with one of the most influential forces in the urban farming movement. Will Allen and his team at Growing Power designated GPI as a regional training center for Central Indiana. Spring of 2012 saw a well-attended “From the Ground Up” workshop at Peaceful Grounds, GPI’s newly formed center for agriculture and sustainability.

If you have a chance to listen to the podcast, you might be struck (like me) by the idea that produce is just one output of Peaceful Grounds. There’s also soil, which is foundational. And then there’s relationships.

People coming together to cooperatively grow food can form some powerful ties. And that’s what it’s all about at Peaceful Grounds.

Sharing worms with youthful visitors

Sharing worms with youthful visitors

Now at the Marion County Fairgrounds, Peaceful Grounds is about to start a weekly farm and arts market, Sundays from noon to 4 starting June 1.

GPI’s work is featured in a chapter of the new book Deep-Rooted Wisdom by Augustus Jenkins Farmer. The chapter is called “Stop Tilling the Soil”—and worm composting is a big part of the system at Peaceful Grounds. (I was thrilled learn that the worms eat brew mash from my local microbrewery, Black Acre, located right here in Irvington.)

Linda will be the guest speaker at next Tuesday’s Green Hour, a project of the Irvington Green Initiative. If you’re in town, come out and join us to hear all about this vital work.

Photos courtesy of Global Peace Initiatives.

I Heart My Garden Tower

Faithful readers of this blog will remember last year’s midseason efforts with a new gardening technology. Due to some missteps and a late start, I had pretty low yields. But this spring the Garden Tower Project, offering a vertical garden design with worm composting right in the tower, is my best friend.

I’m following the instructions this time and fertilizing with organic fish emulsion till my worms get going, and I can already tell a big difference.

I sowed radish and beet seeds in the top of the Tower over a month ago, and it was so exciting when they sprouted.

I sowed radish and beet seeds in the top of the Tower over a month ago, and it was so exciting when they sprouted.

In late March I bought starts from two of my favorite farmers at the winter farmers market, Stout’s Melody Acres and KG Acres.

Sweet little chard seedling in one of the pockets.

Sweet little chard seedling in one of the pockets.

This year I’m not asking each pocket to hold more than one plant (last year I was loath to thin my babies, resulting in spindly, sad specimens).

Beautiful lettuce (before I thinned).

Beautiful lettuce (actually two plants, before I thinned).

Soon I was able to eat my thinnings. Just last week, I harvested a bumper crop of radishes.

And the radishes are still coming!

And the radishes are still coming!

This week I’ve made my salads solely from my own garden (with a few foraged weeds for good measure), and I’ve begun snipping kale leaves to use in green smoothies.

top

More radishes on the way. And here come the beets! I will probably slip a tomato or pepper plant in here before too long.

Here’s what my Garden Tower looked like before I started majorly harvesting a few days ago.

Still room for a cucumber or zucchini seeding on the bottom row. (Yes I do love my greens!)

Still room for a cucumber or zucchini seeding on the bottom row, where that one pea sprout is lagging behind.

And another view.

Yes I do love my greens-- of all kinds!

Yes I do love my greens– of all kinds!

I learned more about the Garden Tower Project when I wrote a piece on it for the May issue of Farm Indiana. I was impressed with the vision of the project’s three partners. For example, at some point in the future they hope to switch from a petroleum-based plastic to plant-based.

According to partner Joel Grant, the type of polyethylene used in the Tower is simple to produce from plant-based sources. “You can produce polyethylene nearly as easily as biodiesel,” the environmental scientist says. “It takes more processing but…in some countries people solely manufacture it out of plant products.”

For more on the Garden Tower Project, visit their webpage or see my story in Farm Indiana (navigate to page 24).

Now I’m off to saute up some chard and radish greens for dinner!

My Garden Tower, One Month Later

It’s been about a month since Judy and I planted our Garden Tower. I last posted about it the day we picked it up from the Good Earth. Time for a post showing the progression.

After some discussion we sited the barrel just outside our back door. We had to sacrifice a few cabbage and collard plants to clear out the space, but it’s the best spot for it. The light color of the siding will reflect light for the plants growing on the back side (though one friend insists we need to innovate some sort of lazy susan apparatus to be able to spin the whole barrel around!)

Filling the Barrel

Filling the Barrel

One of the things I love most about the Garden Tower is its built-in worm composting. I could hardly wait to put saved-up kitchen scraps in there. We also added some semi-decomposed stuff from the compost pile to jump start it.

Adding vegetable matter to the center tube

Adding vegetable matter to the center tube

I bought red wigglers at a feed-and-seed shop, and there were also worms in the soil mix since we used some of our own sifted compost.

Just a handful of worms is enough: they reproduce rapidly.

Just a handful of worms is enough: they reproduce rapidly.

I had soaked seeds in water overnight to give them a head start. It was great fun poking them into the soil.

Planting Little Marvel peas on the more shaded side.

Planting Little Marvel peas on the more shaded side.

Plants scavenged from friends and a local nursery helped round it out.

I bought a couple of bell pepper plants that looked like they might survive, and this gorgeous Genovese basil. I also planted parsley starts around the back and a tomato sucker that a gardener friend rooted.

I bought a couple of bell pepper plants that looked like they might survive, and this gorgeous Genovese basil. I also planted parsley starts around the back and a tomato sucker that a gardener friend rooted.

Soon the seeds started to sprout.

Cucumbers were first to sprout. I don't know if I'll get any cukes having planted them late in the season, but it's fun trying.

Cucumbers were first to sprout. I don’t know if I’ll get any cukes having planted them late in the season, but it’s fun trying.

It was like springtime in July.

Really excited about the amaranth!

Really excited about the amaranth!

After a couple weeks it looked like this. (The cat loves hanging out in the cool shade underneath the tower.)

About 2 weeks after planting.

About 2 weeks after planting.

Today it looks like this!

Check out the cucumber vines, lower right. (And yes that is a cat under there.)

Check out the cucumber vines, lower right. (And yes that is a cat under there.)

The tomato “sucker” has suckers of its own now, and soon I’ll have to stake it. I’ve harvested basil, parsley, and a few thinnings of the greens. The worms have been chewing through their food, so in a few months I’ll have a different kind of harvest—worm castings.

We’re thinking of rigging up some sort of covering to extend the season. I hope we can keep snipping kale and chard into the winter.

I love my Garden Tower. Of course, it is not necessary to purchase this product to have a similar vertical garden. “You just need a blow torch and a two-by-four,” says one plucky friend. That seems a little more than I want to do, but this Garden Sack design looks to be a good DIY alternative.