Don’t Sneeze It, Squeeze It

My spouse hurt her shoulder last week. So my herbalist friend Greg Monzel (co-founder of the newly opened Wild Persimmon School of Wellness) gave me instructions for a special formulation. I knew I was in trouble when he began with “You know what goldenrod looks like, right?”

Yes, the first step in making this formulation—goldenrod-infused oil, excellent for tissue repair, particularly in the shoulder—is “Gather some goldenrod.” (Most people associate goldenrod with fall allergies, but it turns out to be a a fantastic muscle rub, when infused in oil.)

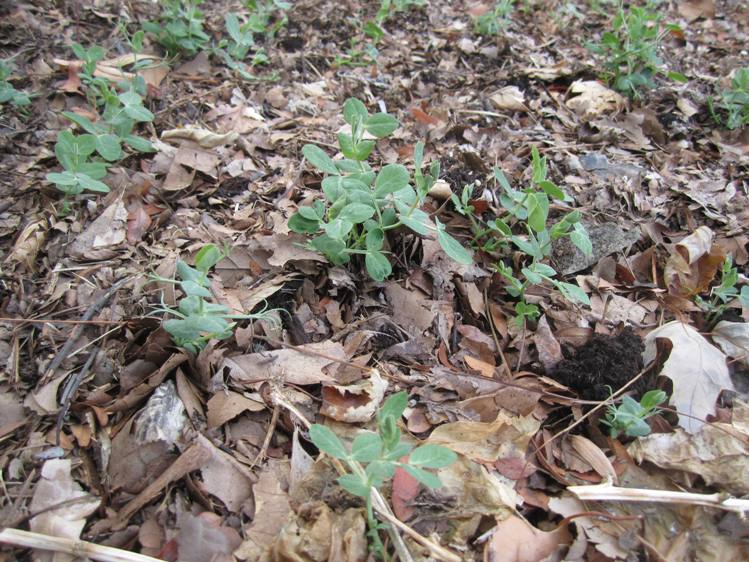
Fortunately for my foraging aspirations, I had already planned a bike ride with some friends, and it was easy to scout goldenrod along the path.

img_20160904_111317015-1024x576

Not hard to spot as it’s in bloom right now.

Greg said it wasn’t necessary to wash the cuttings unless they were very soiled.

img_5057-1024x731

Our cat Edgar promptly set up shopkeeping next to my gleanings.

The next step was to pick the leaves and flowers off the stalks and place in a blender.

img_5059-1024x768

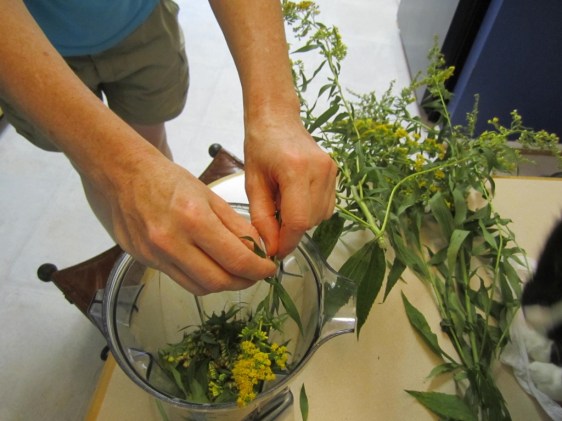
This part was less fun than the foraging.

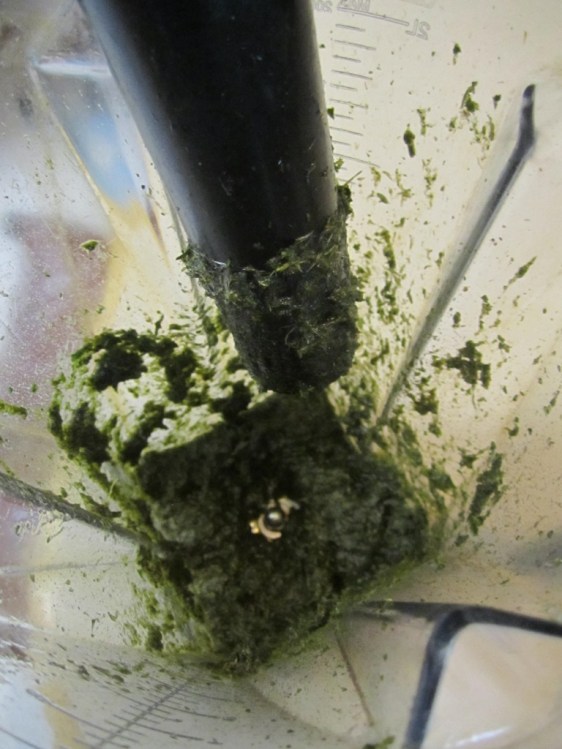
I added oil and started blending.

img_5065-766x1024

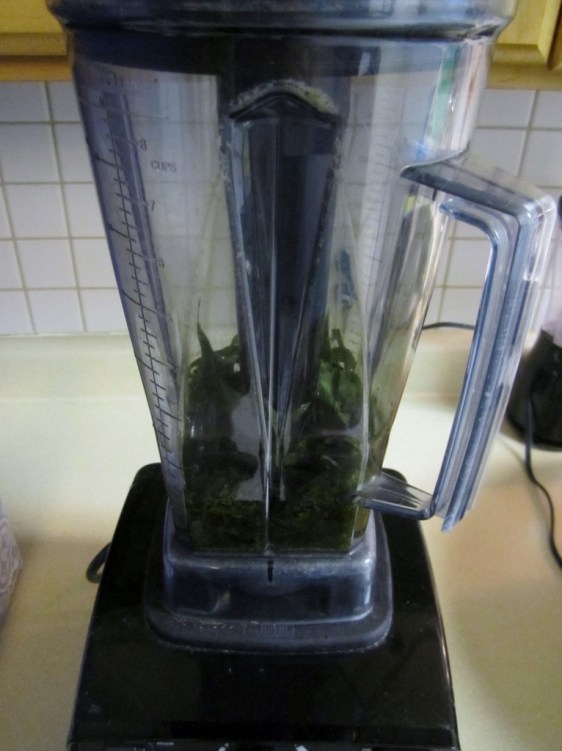
Years ago I received a VitaMix as a gift. I echo a friend who says she can’t decide which is more critical: her smartphone or her VitaMix.

It was supposed to be a smoothie-like consistency, so I needed to add more oil.

img_5067-768x1024

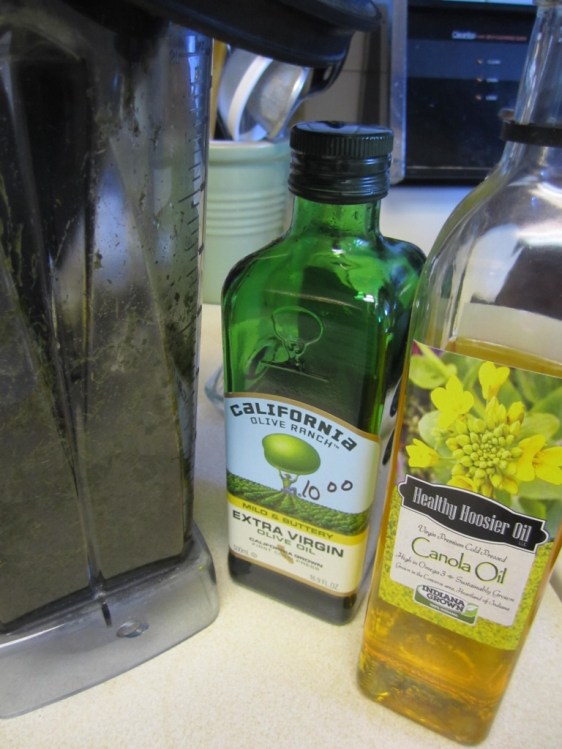
I decided to use some of my Healthy Hoosier Oil canola oil–which is cold-pressed from canola seeds grown just north of where I live.

By now it was more pesto than smoothie, but I quit doctoring it because I didn’t want to use up all my lovely oil.

img_5068-768x1024

I do like my smoothies thick, though.

Greg’s instructions were to “strain it,” so I put it in a mesh strainer. The blend was so thick that I had to mash it and stir it to get any oil out.

Round about here is when I texted Greg, “Is it supposed to look like this?”

img_5070-768x1024

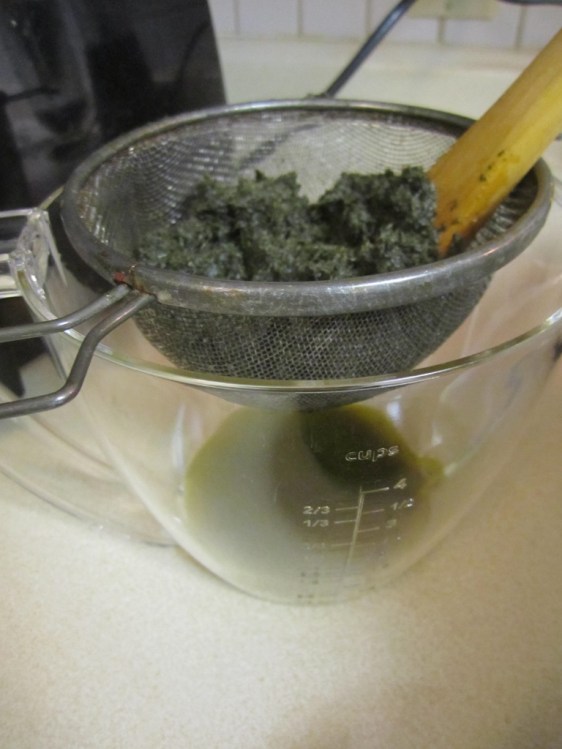
This got old pretty fast.

He said to use a cheesecloth. Oh! I dug some out of the back of a drawer.

img_5074-675x1024

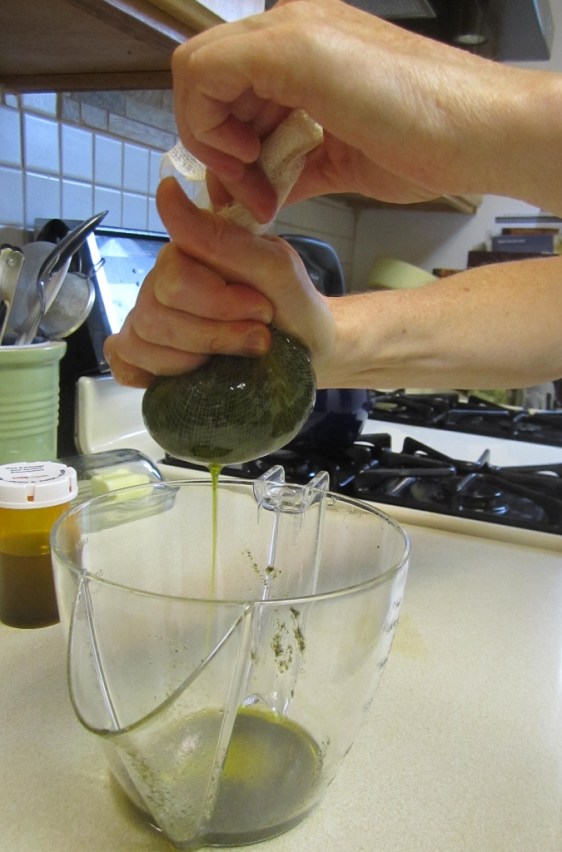
That got the last of the oil out of my “pesto.” In the background (pill container) is the amount I had gotten out by mashing with a wooden spoon.

Finally, the strained-off oil (which still contains some solids and water from the plant) gets set aside to separate.

img_5077-496x1024

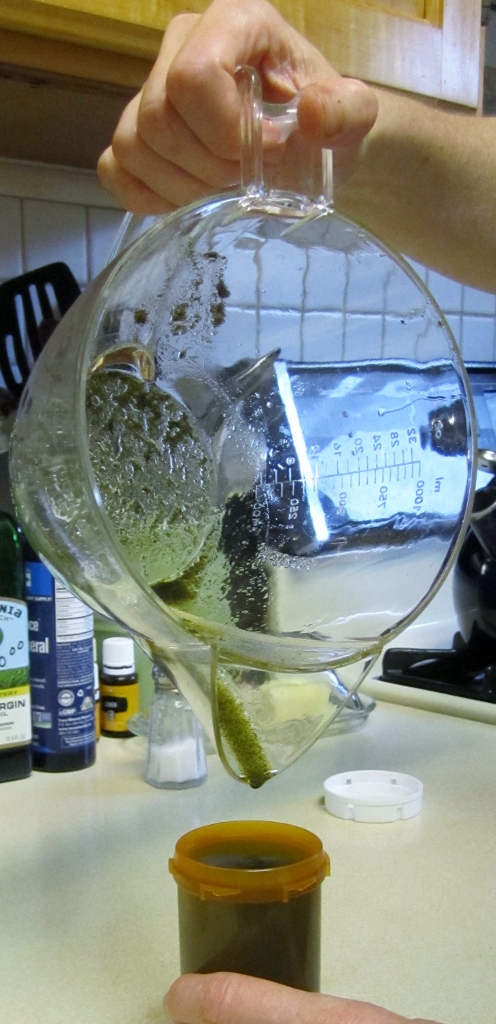
I wish I’d picked a clear container, but oh well.

I forgot to take pictures the next day when I decanted. This is a fancy word for pouring off the oil from the top after the solids and water have settled to the bottom.

Anyway, below is the result. It smells strong and effective! My spouse was game to try it. So far it hasn’t fixed her painful shoulder, but I’m sure it is helping.

img_20160906_182111163-810x1024

It’s somewhat clearer looking in real life. Cell phone photo, sorry.

Actually, after all that cycling, snipping, picking-of-leaves-and-flowers, mashing, squeezing, and decanting, I am starting to develop a crimp in my own shoulder. Good thing I have plenty of goldenrod-infused oil to rub! And bonus: It feels like I have “leveled-up” in my foraging endeavors, harvesting and processing a medicinal all on my own (with text support from the ever-awesome Greg).

Adventures in Worm Composting

A reader asked whether any of my multiple worm bins have overwintered outdoors. The answer is yes. Well, kind of.

Let me give you an overview of the worm farming situation here. I’m not great at raising worms, although it’s supposed to be foolproof. (I refer all questions to Castaway Compost, my go-to for all things vermicompost. Check out my Farm Indiana piece on Keith O’Dell, pirate worm composter.)

1. My first experience was with my Garden Tower. I discovered too late that I stuffed the center tube too full, too fast. This tube is where the worms are supposed to eat their jolly way through my food scraps all summer long, and theoretically survive the winter. In the compacted medium, let’s just say they did not thrive one iota. (This year I’m being more more judicious with my feedings.)

2. Then I started a store-bought dealie with four layers. I am still only on the second layer almost a year later. I can’t figure out how to get my wigglers to eat and reproduce very fast. And I’m not sure when to harvest the castings. But I haven’t completely killed anyone off yet—that I know of.

Here’s a top view of my Sunleaves bin. I used coconut coir as the bedding. This was before I added the second layer, using shredded office paper as the bedding.

My storebought worm bin, which stays in the basement year-round.

My store-bought worm bin, which stays in the basement year-round.

3. My third foray is indeed a year-round outdoor “bin”—more of a pit, really. We used a book called The Complete Compost Gardening Guide as our inspiration for this project. The idea is to have a covered hole in which to compost food and yard waste, convenient to your kitchen door. So, last fall we dug a rectangular pit about 18 inches deep. (I use the word “we” loosely on this digging bit.)

I forgot to document the digging and building phases.

Unfortunately I forgot to document the digging and building phases.

We started off by putting shredded leaves from our yard (and the neighbors’) into the pit, without adding any worms. We cover all our garden beds with the same stuff.

Affixing hardware to the lid, which I believe was cobbled together from old pallets.

Judy affixing hardware to the lid, which I believe was cobbled together from old pallets.

At the time I did not have a paper shredder that worked, so I geeked out on hand shredding things for a while. I just really like the idea of worms eating stuff like phone books and toilet paper rolls!

A very patient friend spent an evening helping me create paper bedding to add to the shredded leaves. Worm farming = big fun for all!

A very patient friend spent an October evening helping me tear up paper to add to the shredded leaves. Worm farming = big fun for all!

We added the shreds to the leaves along with some vegetable scraps for worms to munch on.

Creating a nice buffet and bed for the wigglers.

Creating a nice buffet and bed for the wigglers.

The next step was to moisten everything well. Worms do not like dry places.

Mixing and moistening

Mixing and moistening. I must not have had any rainwater.

The book said something about worms appreciating the channels in corrugated cardboard, so I added some wet strips of cardboard. It also said they go crazy for cornmeal or wheat flour. We had a bag of flour that a mouse had chewed through, so I sprinkled some of that on top. Then it was Wiggler Time.

The dark stuff is a handful of bedding and worms from the indoor bin.

The dark stuff is a handful of bedding and worms from the indoor bin.

After that, we just tossed our kitchen scraps on top, crushing egg shells as best we could with a hoe. We did it all winter long, except when the lid was frozen shut or buried under snow.

Then this spring, someone suggested spreading some soil on top and giving the worms a break from new food. I did that, and later added a layer of shredded paper. (Our Christmas gift to ourselves was a whiz-bang shredder. Total Geekdom.)

Shredded paper as mentioned in my previous post!

Shredded paper, as detailed in my previous post

Now you can see, a few months later, that the stuff is well on its way to becoming a sweet soil amendment. Worms are still in there. (Whether they’re the original worms or their offspring or some random opportunists, I can’t say. But I think I can claim this as an overwintering victory.)

Lots of brown eggshells still showing. What can I say, I eat a lot of eggs.

Lots of brown eggshells still showing. What can I say, I eat a lot of eggs.

I recently pulled the bulk of the material to one side to begin adding another round of food scraps. The experiment continues…

There’s still a fourth bin to talk about, also outside, which is new this summer. But that might be for another day. Let me see how it works out first!

Thar be worms in that thar bin (unless they've perished in the heat).

Thar be worms in that thar bin (unless they’ve perished in the heat).

A Mycological Field Trip

Yesterday we drove down to southern Indiana to visit Magnificent Mushrooms, Eric Osborne’s hub for all things mycological. Located outside of Paoli, IN, this growing business offers products and information for the would-be home mushroom cultivator.

That turns out to be us: we came home with three kinds of spawn to put to work here on our wee homestead: “old faithful” shiitakes, Lion’s Mane, and King Stropharia (winecaps).

I will keep you posted on our efforts to expand our food production into the fungal kingdom! I’m a bit concerned about keeping Kitley (our outdoor cat) and his pals away from the logs and woodchips we’ll use as substrate. As I understand it, mushrooms are tolerant of many things…but they probably wouldn’t want to drink cat pee or get all clawed up, any more than I would.

Old Faithful is a strain of shiitake that is slightly furry. Here it is growing off a block of sterilized, inoculated grain.

Old Faithful is a strain of shiitake that fruits in a slightly furry mushroom. Here it is growing off a block of sterilized, inoculated grain.

I’m most excited about attempting to grow winecaps, also known as “the garden mushroom” for its friendly affinity for the vegetable garden.

Bags of King Stropharia spawn

Bags of King Stropharia (winecap) spawn

We plan to try starting it not only in our backyard beds, but also in a low-lying place in the front yard. A natural bowl beneath the sweetgum tree is often waterlogged, and Eric said this kind of spot is perfect for winecaps.

As for Lion’s Mane, I’ve never eaten it, but Eric says it tastes like “heaven on earth.” It’s a pale blobby mushroom that looks a bit like some oceanic organism. Or maybe a cartoon nose.

Eric and I petting a Lion's Mane mushroom.

Eric and I petting a Lion’s Mane mushroom.

Eric sells his harvest to area chefs, so if you’ve eaten a mushroom dish at a Bloomington restaurant, you may have sampled his wares.

He also offers cultivation workshops and consultations. In partnership with the Hoosier Mushroom Society and the state department of health, he’s developed a certification course for wild mushroom hunters, which would allow them to comply with regulations around selling their harvest.

Speaking of: Know any good morel hunting spots?

Peas and the Possible

“The Possible’s slow fuse is lit

By the Imagination.”

—Emily Dickinson

Austrian winter peas planted in my garden

Austrian winter peas planted in my garden

We have already had snow and single digit wind chills here. Yet these Austrian winter peas, planted very late, still grow.

My friend Dawn gave me a couple generous handfuls of seed to play with. I’d never heard of this hardy cover crop that doubles as a tasty wintertime salad green. But Mother Earth News had the full scoop on  planting Austrian winter peas. So somewhere between transplanting herbs and cooking up harvest stews, I threw those seeds in the ground.

I’m so glad I did!

This is the time of year when nighttime slams down on us pretty hard. A time for diving deep and dreaming. Those tender sprouts remind me that sweet tendrils of possibility can thrive in this liminal space.

I’ve been spending a fair amount of time in a space of unknowing. Allowing guidance to emerge organically, and playing with a deeper trust than I’ve ever had before.

And I love walking out my back door and seeing my little crop. If I never get to eat the shoots, I’ll be perfectly happy just with the view.

Thanks to Yes Magazine‘s Winter 2015 issue for the stunning Dickinson quote.

Expanding the Medicine Chest with Herbs

Last week I spent a sunny afternoon working an herb garden while learning more about the uses of medicinal herbs. My friend Greg Monzel is a community herbalist who’s helped many (including me) with natural medicines that he grows, gathers, and prepares. Another friend, Dawn Ryan, also helped with Greg’s culinary herb garden in exchange for several transplants.

We started with homemade herbal tea in the kitchen, where Greg’s son charmed the socks off us.

Ready for action

Ready for action

Since moving to this property, Greg’s had all his herbs in the “back 40.” Our goal was to help transplant culinary herbs to a kitchen garden right outside the back door.

To the back 40, with Greg's dog Timber eager to show us the way.

To the back 40, with Greg’s dog Timber eager to show us the way.

His ingenious plan: to keep a slight trench running the length of the bed, starting near the hose and slanting slightly toward the opposite end. With cornstalks laid in as slowly-decomposing organic matter, the trench will allow for ease of watering. Prepping the bed was our first task.

Planting cilantro in front of the trench

Planting cilantro in front of the trench

Then, over lunch of butternut squash soup and salad straight out of the garden, we talked about medicinal herbs. Greg produced a book called The Herbal Medicine-Maker’s Handbook, which included a list of the most useful herbs. I realized I already have several of these in my garden, though I only actively use one. (We have a passionflower growing up our fence. I cut the vines in fall to dry into a calming tea. That’s after we—and the bumblebees—enjoy the blooms all summer.)

A maypop planted along our fence, one of many plantings inspired by permaculture

Passionflower in summer. We thought we were growing it  for its fruit, but for me, it’s all about the tea!

And did you know that many culinary herbs also have medicinal function? Greg gave the example of sage: It dries up things like colds and post-nasal drip. This makes me happy to host three large sage “bushes,” which we periodically snip for seasoning and smudging.

Later, after we’d dug up and moved sage, lavender, thyme, parsley, and the like, it was time to make our selections from Greg’s herbs. I chose creeping thyme, feverfew, valerian, motherwort, pennyroyal, spearmint, yarrow, and a lovely wild mint that has been going strong for a couple generations now. Greg’s Dad first brought it into his garden, and Greg took starts of it, and now is giving starts away.

Herbalist and son showing us medicinal herbs

Herbalist and son showing us medicinal herbs

That’s the way of gardeners, isn’t it? In fact, the day reminded me an awful lot of hanging out with my Dad in his garden on a fall day. He’d divide plants and offer them to me and any of my friends who expressed the slightest interest.

Dawn and I worked together the next day, figuring out where to tuck in our new babies, giving them a good start. It felt great to expand the resilience of my home medicine chest, especially in such good company. And maybe someday soon I will have starts to give away myself.

diggin

DIY Food, Medicine, Soil: There’s a Shroom for That

I am still thinking about the Radical Mycology Convergence, an incredibly enriching experience. My last post covered mainly big picture inspiration. Here’s some more hands-on stuff.

For someone who likes to pick wild berries and weeds, I’m terribly ignorant of wild mushrooms. I had no idea that I could eat the puffball mushrooms that occasionally pop up right here in urban yards (my own included).

By Nowa (Own work), via Wikimedia Commons

By Nowa (Own work), via Wikimedia Commons

In a workshop called “Foraging for Five Foolproof Fungi” we learned about morels, maitake, chicken of the woods, puffballs, and oyster mushrooms. I now desperately want to go mushroom hunting.

But fungi offer us way more than food. As anti-tumor agents and immune boosters, certain mushrooms are powerful medicine. I was excited to hear Peter McCoy speak about home cultivation techniques as a way to make these therapies more affordable.

He said that capsulated versions of medicinal mushrooms are simply mycelium grown on brown rice and dehydrated, with an expensive price tag slapped on them. He passed around a bag of myceliated grains—I think it was cooked rye that had been inoculated with a type of medicinal mushroom mycelium—that kind of looked like white popcorn all mashed together. This is home-cultivated medicine that you can eat (although it probably doesn’t taste like popcorn!)

Then there’s the way fungi can turn waste products into food. I blogged about an example of this last year—how coffee plantation waste, normally burned, can be fed to mushrooms.

Coffee_pulp_mushroom

A mushroom growing on coffee pulp in south-west Rwanda, via Wikimedia Commons

It’s mind-boggling that a nutrient-dense superfood has so few demands; oyster mushrooms, for example, are 30 percent protein and can grow on cardboard! Even citydwellers with limited time and space can grow myceliated grains as a healthy, immune-boosting food.

And as soil helpers, fungi are critical. Below the soil surface many species of fungi are working their magic. But one species in particular, known as wine caps, has double benefit: They fruit with a deliciously edible mushroom, and they build soil tilth. They’re known as the garden mushroom for the way they can be cultivated right alongside garden vegetables.

"Stropharia aurantiaca". via Wikimedia Commons

“Stropharia aurantiaca,” via Wikimedia Commons

The upshot: My spouse and I have moved from this feeling of “it’s too overwhelming to take on a new project” to “let’s grow some mushrooms!”

We came home with plug spawn for chicken of the woods, and I’ve talked to my arborist friend about sending some logs my way this winter. (He said he’d love a few bits of spawn in exchange, and I’m happy to share!) We also want to try growing some winecaps in our garden beds. And since these are both spring projects—and who wants to wait?—we’ll probably grow oysters indoors from a kit this winter.

Stay tuned for reports on our experiments!

Can’t get enough radical mycology? Check out this interview with Peter at Permaculture Voices—the link has several videos showing hands-on home cultivation steps as well.

Reconnecting

Today I enjoyed time with two friends in two separate food-related endeavors. One of them crazy enough to get up early and go questing for a supposedly killer purslane haul. The other tenacious enough to spend several hours shredding produce in my kitchen to make two varieties of sauerkraut.

Two crocks of veggies are fermenting on my table right now.

A batch we made together another time.

A batch we made together another time.

The purslane was a little “gone by,” but we are salvaging it as chicken feed.

And in both cases, we had a great time together, reconnecting.

It made me think of something I just read in an e-newsletter from an eco-village called Dancing Rabbit.

Relearning harmony with the earth at this time in existence is a great undertaking, in a world where bug spray, Big Macs, smartphones, and petroleum are readily available.

Young Thoughtful

It is a great undertaking, I agree. Everything in our culture pulls in the opposite direction. But friends can ease the way. They make swimming upstream companionable.

What about you? In what ways do your friends join you in living a bit more lightly on the planet?

Now We’re Cooking…with Sunshine

We offered our solar cooking workshop last weekend to an enthusiastic “crowd” of 17. That’s the biggest group a Pogue’s Run Grocer class has ever attracted, so we were pleased.

Judy demonstrating how to make a lid for a box cooker.

Judy demonstrating how to make a lid for a box cooker.

Judy has developed a wooden model, but we’re still working out the kinks. So we focused the class on “the old workhorse,” our tried-and-true cardboard box cooker. We wanted to show that you can start cooking with sunshine using only cheap (or free!) materials.

Judy adapted the design out of our solar cookery bible, Cooking with Sunshine. And you can find DIY instructions online as well.

All it needs now is an arm to prop the reflector--and you can make this out of a wire hanger.

All it needs now is an arm to prop the reflector. You can make this out of a wire hanger.

One of the attendees, a firefighter, plans to make the box cooker at the firehouse. He has a big vegetable garden, and he brought us all kinds of herbs and veggies in thanks for the teaching. He was eager to try using up garden produce in all-day stews and soups.

And we discovered after the class was done that another of the attendees has already been experimenting with solar cooking quite a bit. He sent me this inspiring video, proving me wrong when I said, “No, you can’t solar cook in the winter, because the sun’s too low.” Check it out!

The company behind this innovative design is called Solar Clutch. Its mission is promoting solar cooking in high risk areas of the world. I hadn’t heard of Solar Clutch, but I’m proud to find my home state of Indiana producing such a company.

Perhaps solar cooking season doesn’t have to end on Sept. 15 after all!

Building with the Mudgirls

I spent part of last week at a workshop offered by the Mudgirls, a natural building collective in British Columbia.

The Mudgirls strive to live lightly on the earth while sharing skills among themselves and the wider community. And when it comes to resilience, building shelter from earthen materials is about as serious as you can get. This is a group that embodies the reimagined world, and a powerful DIWO (do-it-with-others) spirit.

The Mudgirls do their work in child- and mother-friendly style.

The Mudgirls do their work in child- and mother-friendly style.

Collective member Rose hosted our workshop on cooperatively owned land on Denman Island. We camped in the forest by night and bartered our labor for instruction by day. About 15 others took part, bringing enthusiasm and good humor to the work.

Some of our group making cob, a mix of clay, sand, straw, and water.

Some of our group making cob, a mix of clay, sand, straw, and water.

Rose is converting an existing structure on the land into a home for herself and her family. Using temporary plywood forms, we packed the walls with insulating material called slip straw. We made this insulation from straw and a clay-and-water slurry.

Making "slip straw" to insulate the walls. (Spot the pasty writer?)

Making “slip straw” to insulate the walls. (Spot the pasty writer?)

In a few weeks the walls will be dry enough to plaster.

house

House with slip straw insulation in the walls. The plywood is temporary, just to create a form to pack the slip straw in.

A hand-laid stone foundation forms the base for a cob-walled addition. (The team that worked on setting the stone found it a lesson in patience.)

Wall taking shape on top of the stone foundation

Wall taking shape on top of the stone foundation

We all helped mix the cob, which is a blend of clay, sand, and water, with a sprinkling of straw. While clay has compressive strength, it lacks tensile strength–the role of the straw. We learned that the straw has a similar job as rebar in concrete, adding internal structure to the dense material.

Mixing a batch of cob.

Mixing a batch of cob.

Building the wall was perhaps the most exciting task.

Building the wall

Building the wall

Some people made it look easy. But I’m still not sure the section I worked on could be called plumb!

Room addition taking form, with window.

Room addition taking form, with window.

I asked Molly, one of the Mudgirls who helped with instruction, how the Mudgirls mission fits into the broader picture of ecological and societal upheaval. Beyond  her passion for natural building, she told me, what excites her is the community that’s being nurtured.

Molly mixing clay slip with a giant eggbeater-type tool.

Molly mixing clay slip with a giant eggbeater-type tool.

The women of the collective have known each other for years and have a solid commitment to each other. They make decisions by consensus, taking the time to talk things out (though in recent years the talks are shorter as the big issues have been resolved). Members all know that they have each others’ best interest at heart, and each agrees to take responsibility for her own needs and desires.

Molly said that people who come to workshops often reconnect at later events, forming lasting friendships. So community extends beyond the core collective. She sees participants as pollinators, taking our inspiration beyond the islands of British Columbia.

Example of a finished cob house (actually this one's a hybrid).

Example of a finished cob exterior.

For me the experience was all about the freedom to try something new. I had to grant myself compassion for the learning curve, and work on forgiving my body its frailties. The Mudgirls’ supportive environment made that possible.

And it was thrilling to help build an actual home. These hands that spend so much time on a keyboard are part of Rose’s homestead now.

Going Soil-Friendly

Do you ever think about the importance of the innumerable tiny creatures living underground, right under your feet? In just one tablespoon of soil, according to North Carolina State University’s Cooperative Extension Service, some 50 billion microbes are working away.

That’s if the soil is healthy.

By NoNomme (Own work) [CC0], via Wikimedia Commons

By NoNomme (Own work) [CC0], via Wikimedia Commons

I remember a conversation with an Ohio woman active in the environmental movement. She told me a story about a farmer who decided to switch his (conventionally farmed) cornfields to chemical-free produce. His seeds sprouted, but grew stunted and deformed.

The land had been blasted with petrochemicals year after year. Now there was nothing left to support a plant. No microbes. No nutrients.

But it doesn’t have to be that way.

My most recent Farm Indiana piece concerns a small agricultural fertilizer business called Sterling Formulations, led by a young man aptly named Vince Plowman.

Sterling Formulations’ team assesses farm fields and recommends soil-friendly additives depending on the particular needs of each field. They apply microbes and micronutrients to balance and nourish the soil that nourishes us.

Filling a container with earth-friendly fertilizer concentrate at Sterling Formulations' Shelbyville, IN plant.

Filling a container with earth-friendly fertilizer concentrate at Sterling Formulations’ Shelbyville, IN plant.

The team includes an Amish farmer who offers knowledge based on generations of experience. (My people!)

“The Amish have been farming organically for centuries, and quite successfully,” Vince told me. “They treat their soil right, and guess what, they’re getting yields comparable to conventional.”

He was surprised to learn that conventional farmers are as receptive to this message as organic growers. He said, “We found, in talking to a lot of conventional farmers, that so many of them are curious.”

Corn Field

Though he half-expected a derisive response from the conventional agribusiness side, so far that has not been the case. “What we found is they’re absolutely afraid…They don’t know how to do it (transition off chemicals), and they don’t have anyone to step them through the process of going to organics without absolutely killing themselves. They’re used to getting 200 bushels an acre, and they’re afraid they’re going to get 50 next year” if they stop using chemicals.

What comes next in that scenario isn’t pretty: they’d likely lose their farm. And many in that arena are supporting multiple families on the farm.

But Sterling Formulations is stepping into the gap. The goal is to help heal beleaguered soil through tailored applications of microbes and kelp-based fertilizers. Instead of petrochemicals that artificially prop up crops, these nutrients and tiny creatures create a living medium for plants.

This is one of the most exciting developments I’ve heard about in a long time. Farmers who want to stop using chemicals can get support in the switch—and stay profitable during the transition.

You can read more about Sterling Formulations in my Farm Indiana story.